LimeSDR-QPCIe driver installation
Driver installation
This chapter guides through the USB3 and PCIe drivers installation for the LimeSDR-QPCIe board under Windows and Linux operating systems.
USB3 drivers
USB driver installation procedure is the same as LimeSDR-USB board and same LimeSDR-USB driver installation description instructions can be applied for LimeSDR-QPCIe board.
PCIe drivers
In this chapter PCIe drivers installation procedure can be found.
Linux PCIe drivers
No need to install PCIe drivers for Linux operating system.
Windows pcie driver installation procedure
Download the latest drivers , select xillybus-windriver-1.2.0.0.zip package and unzip. First time LimeSDR-QPCIe board is connected to the PC, follow the installation procedure below.
First time LimeSDR-USB board is connected to the PC, follow the installation procedure below.
- Press Start Menu, type Device Manager and press enter. Device Manager window appears.
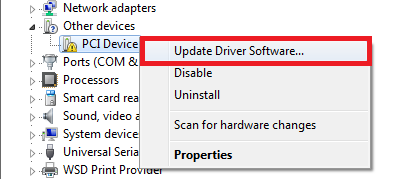
- When LimeSDR-PCIe board is plugged in, in Device Manager it appears as PCI Device under Other devices. Right click on the PCI device and select Update Driver Software.
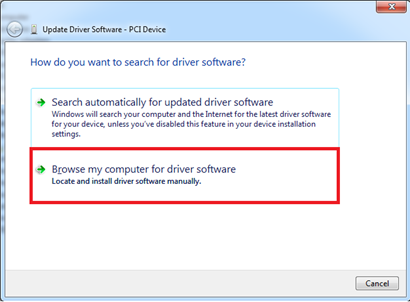
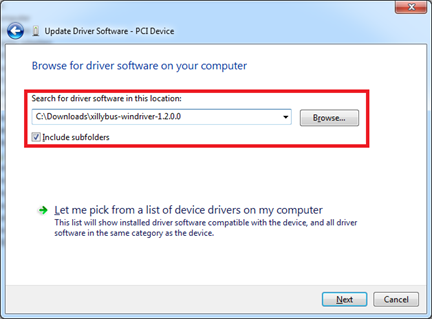
- Select Browse my computer for driver software and in browse window choose driver from downloaded package (extracted files from xillybus-windriver-1.2.0.0.zip).
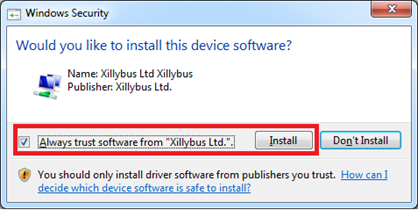
- After selecting driver files and clicking Next button Windows security warning might appear, check Always trust software from “Xillybus Ltd” and click Install.
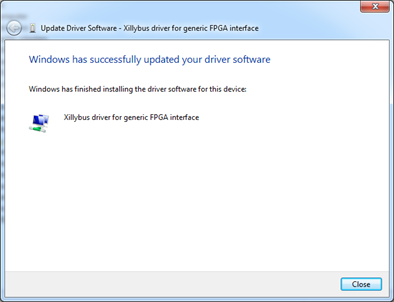
- After successful installation (Figure 6) “Xillybus driver for generic FPGA interface” will appear under Xillybus device (Figure 7).

| |||||||||||||||||||||