Getting Started with LimeSDR-USB and LimeSuiteGUI: Difference between revisions
No edit summary |
No edit summary |
||
| Line 2: | Line 2: | ||
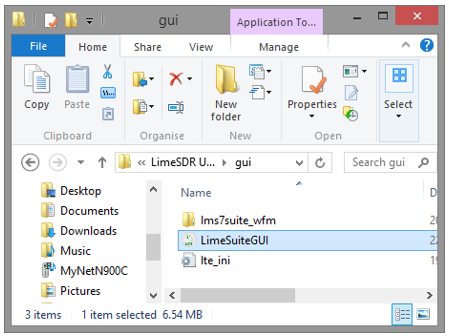
First of all, connect LimeSDR-USB board to PC USB3.0 socket. Please go [[LimeSDR-USB_driver_installation|Driver Installation Documentation]] to see how to install OS drivers so your PC can see LimeSDR-USB board. In the provided USB Flash there is a folder GUI in which you will find LimeSuiteGUI.exe file (or just download the software from [[LimeSDR-USB#LimeSuiteGUI_for_Windows | here]]). Open it. | First of all, connect LimeSDR-USB board to PC USB3.0 socket. Please go [[LimeSDR-USB_driver_installation|Driver Installation Documentation]] to see how to install OS drivers so your PC can see LimeSDR-USB board. In the provided USB Flash there is a folder GUI in which you will find LimeSuiteGUI.exe file (or just download the software from [[LimeSDR-USB#LimeSuiteGUI_for_Windows | here]]). Open it. | ||
[[File:Opening_LimeSuiteGUI_file.png|thumb|center|600px|Figure 1. Opening LimeSuiteGUI.exe file]] | [[File:Opening_LimeSuiteGUI_file.png|thumb|center|600px|Figure 1. Opening LimeSuiteGUI.exe file]] | ||
| Line 9: | Line 8: | ||
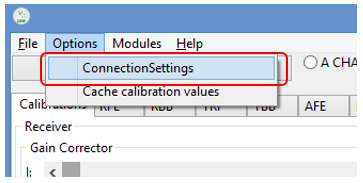
To launch LimeSuiteGUI application go to menu and select: Options -> Connection Settings as shown in Figure 2. | To launch LimeSuiteGUI application go to menu and select: Options -> Connection Settings as shown in Figure 2. | ||
[[File:Opening_connection_settings.png|thumb|center|600px|Figure 2. Opening connection settings]] | |||
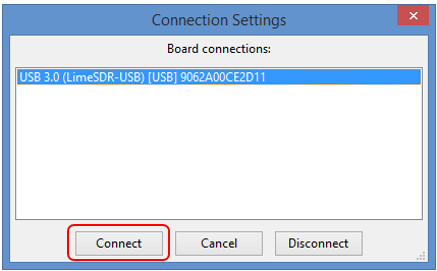
Select LimeSDR-USB board as shown in Figure 3 and press Connect. | |||
[[File:LimeSuiteGUI_select_ports.png|thumb|center|600px|Figure 3. LimeSuiteGUI select ports]] | |||
== Loading and saving register settings == | |||
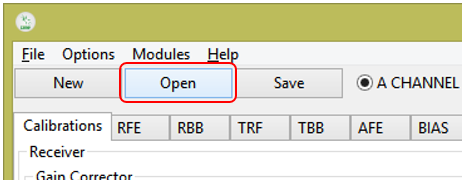
In order to load settings, click button Open as shown in Figure 4. | |||
[[File:Opening_LimeSuiteGUI_settings_file.png|thumb|center|600px|Figure 4. Opening LimeSuiteGUI settings file]] | |||
Select .ini setting file and click Open as shown in Figure 5. | |||
[[File:Selecting_LimeSuiteGUI_settings_file.png|thumb|center|600px|Figure 5. Selecting LimeSuiteGUI settings file]] | |||
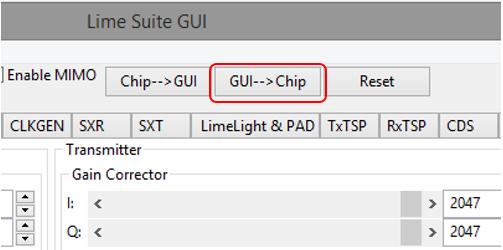
Then click GUI --> Chip button as shown in Figure 6. | |||
[[File:Sending_LMS7002M_settings_to_LimeSDR-USB_board.png|thumb|center|600px|Figure 6. Sending LMS7002M settings from GUI to LimeSDR board]] | |||
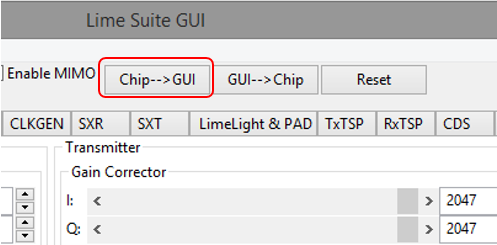
If you want load all LMS7002M settings from LimeSDR-USB to GUI, then click button Chip-->GUI as shown in Figure 7. | |||
[[File:Sending_LMS7002M_settings_to_GUI.png|thumb|center|600px|Figure 7. Sending LMS7002M settings from LimeSDR-USB to GUI]] | |||
Revision as of 14:01, 28 August 2017
Launching LimeSuiteGUI and connecting to the board
First of all, connect LimeSDR-USB board to PC USB3.0 socket. Please go Driver Installation Documentation to see how to install OS drivers so your PC can see LimeSDR-USB board. In the provided USB Flash there is a folder GUI in which you will find LimeSuiteGUI.exe file (or just download the software from here). Open it.
To launch LimeSuiteGUI application go to menu and select: Options -> Connection Settings as shown in Figure 2.
Select LimeSDR-USB board as shown in Figure 3 and press Connect.
Loading and saving register settings
In order to load settings, click button Open as shown in Figure 4.
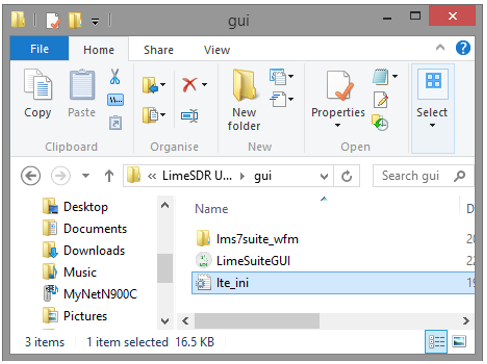
Select .ini setting file and click Open as shown in Figure 5.
Then click GUI --> Chip button as shown in Figure 6.
If you want load all LMS7002M settings from LimeSDR-USB to GUI, then click button Chip-->GUI as shown in Figure 7.
| |||||||||||||||||||||