LimeSDR Quick Start: Difference between revisions
AndrewBack (talk | contribs) |
Ghalfacree (talk | contribs) (Update for physical cabling, firmware update, and other additional details.) |
||
| (3 intermediate revisions by one other user not shown) | |||
| Line 1: | Line 1: | ||
This page is designed to help new owners of LimeSDR hardware get started as quickly as possible. | |||
== | == Assembling the hardware == | ||
[[File:LimeSDR-USB_acrylic_case_asembly.jpg|700px]] | [[File:LimeSDR-USB_acrylic_case_asembly.jpg|700px]] | ||
The LimeSDR comes with multiple RF ports, to which U.FL to SMA cables can be connected. Not all of these ports need to be used simultaneously, and your first step is to decide which of the ports you need to connect for your particular use case - along with, optionally, choosing a case compatible with the number of ports you are going to use. | |||
The below table explains the difference between each port on the LimeSDR. | |||
= | {| class="wikitable" | ||
|+LimeSDR-USB RF ports | |||
|- | |||
! Label | |||
! Description | |||
|- | |||
|RX1_H | |||
|Channel 1 RX - frequencies above 1.5GHz | |||
|- | |||
|RX2_H | |||
|Channel 2 RX - frequencies above 1.5GHz | |||
|- | |||
|RX1_L | |||
|Channel 1 RX - frequencies below 1.5GHz | |||
|- | |||
|RX2_L | |||
|Channel 2 RX - frequencies below 1.5GHz | |||
|- | |||
|RX1_W | |||
|Channel 1 RX - wideband | |||
|- | |||
|RX2_W | |||
|Channel 2 RX - wideband | |||
|- | |||
|TX1_1 | |||
|Channel 1 TX - primary (all frequencies) | |||
|- | |||
|TX2_1 | |||
|Channel 2 TX - primary (all frequencies) | |||
|- | |||
|TX1_2 | |||
|Channel 1 TX - secondary (all frequencies) | |||
|- | |||
|TX2_2 | |||
|Channel 2 TX - secondary (all frequencies) | |||
|} | |||
Depending on which board variant you have, it will require one of the following '''USB 3.0''' cables: | Note that: | ||
* Optimal RX performance is provided by using the *_H and *_L ports with the frequency bands shown; | |||
* The secondary TX ports for each channel can be used with power amplifiers covering different bands as well as for loopback, etc.; | |||
* You will need to select which ports you have chosen when configuring your software. | |||
If you have the official LimeSDR Acrylic Case, see the [https://github.com/myriadrf/LimeSDR-USB_acrylic_case#assembly assembly instructions here]. | |||
== Connecting to your computer == | |||
[[File:USB3 cable.jpg]] | |||
Depending on which LimeSDR board variant you have, it will require one of the following '''USB 3.0''' cables: | |||
* Type A plug to Type Micro B plug | * Type A plug to Type Micro B plug | ||
* Type A plug to A socket | * Type A plug to A socket | ||
Note that the LimeSDR is a powerful device, and may not receive the power it needs from a single USB port. The use of a Y-splitter, which uses one Type A plug for power and data and a second Type A plug for additional power, is recommended; users of portable devices like the Apple MacBook Air or Microsoft Surface families, which have USB ports on opposite sides of the device, may also require a USB extension cable which should be connected to the secondary, power-only, leg of the Y-splitter. | |||
== Install Lime Suite == | == Install Lime Suite == | ||
| Line 20: | Line 70: | ||
[[File:lime_suite_comps.png|700px]] | [[File:lime_suite_comps.png|700px]] | ||
Lime Suite provides an SDR driver and a configuration | Lime Suite provides an SDR driver and a configuration interface along with numerous utilities. Support is provided for the following platforms: | ||
* Linux | * GNU/Linux, including official packages for Ubuntu Linux; | ||
* | * Apple macOS via Homebrew; | ||
* Windows | * Microsoft Windows via the PothosSDR Installer. | ||
Lime Suite can be installed by compiling from source or via binary packages. Note that in the case of Windows a hardware driver must also be installed as a separate part of the process. | |||
For further details see the [[Lime Suite|Lime Suite documentation]]. | |||
== Testing the LimeSDR == | |||
== | [[File:LimeSDR-USB SelfTest FFT.jpg|700px]] | ||
=== Updating the firmware and gateware === | |||
The LimeSDR relies on firmware and gateware loaded onto its FPGA to operate, collectively known as the firmware. This firmware is constantly updated to improve the LimeSDR's functionality and reliability, and running the latest version is recommended. | |||
To update the LimeSDR's firmware, as well as to test the communication between the host PC and the LimeSDR, open your operating system's command-line interface and run the following command: | |||
<code> | |||
LimeUtil --update | |||
</code> | |||
This will update both the firmware and the gateware on the LimeSDR to the version supplied with your copy of Lime Suite. Do not disconnect the LimeSDR during the update process. | |||
=== | === Testing basic operations === | ||
Instructions for carrying out a loopback test using Lime Suite are available on the page [[LimeSDR-USB Quick Test]]. This loopback test is the simplest and most direct way of confirming that you have a functioning board with appropriate USB controller firmware and FPGA gateware loaded. | |||
=== SoapySDR === | === Testing via SoapySDR === | ||
The [[Lime_Suite#Device_enumeration|Lime Suite wiki page explains how | The [[Lime_Suite#Device_enumeration|Lime Suite wiki page]] explains how LimeUtil can be used to get a list of available devices and SoapySDRUtil to verify that it will be available to SDR ecosystem applications via SoapySDR. Providing the LimeSDR is listed by SoapySDRUtil, you are ready to begin working with it using the compatible software of your choice. | ||
{{Community}} | {{Community}} | ||
Latest revision as of 13:50, 21 February 2018
This page is designed to help new owners of LimeSDR hardware get started as quickly as possible.
Assembling the hardware
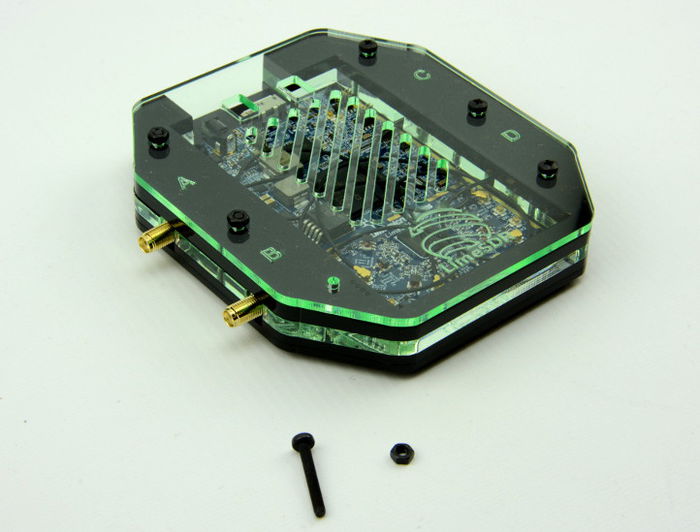
The LimeSDR comes with multiple RF ports, to which U.FL to SMA cables can be connected. Not all of these ports need to be used simultaneously, and your first step is to decide which of the ports you need to connect for your particular use case - along with, optionally, choosing a case compatible with the number of ports you are going to use.
The below table explains the difference between each port on the LimeSDR.
| Label | Description |
|---|---|
| RX1_H | Channel 1 RX - frequencies above 1.5GHz |
| RX2_H | Channel 2 RX - frequencies above 1.5GHz |
| RX1_L | Channel 1 RX - frequencies below 1.5GHz |
| RX2_L | Channel 2 RX - frequencies below 1.5GHz |
| RX1_W | Channel 1 RX - wideband |
| RX2_W | Channel 2 RX - wideband |
| TX1_1 | Channel 1 TX - primary (all frequencies) |
| TX2_1 | Channel 2 TX - primary (all frequencies) |
| TX1_2 | Channel 1 TX - secondary (all frequencies) |
| TX2_2 | Channel 2 TX - secondary (all frequencies) |
Note that:
- Optimal RX performance is provided by using the *_H and *_L ports with the frequency bands shown;
- The secondary TX ports for each channel can be used with power amplifiers covering different bands as well as for loopback, etc.;
- You will need to select which ports you have chosen when configuring your software.
If you have the official LimeSDR Acrylic Case, see the assembly instructions here.
Connecting to your computer
Depending on which LimeSDR board variant you have, it will require one of the following USB 3.0 cables:
- Type A plug to Type Micro B plug
- Type A plug to A socket
Note that the LimeSDR is a powerful device, and may not receive the power it needs from a single USB port. The use of a Y-splitter, which uses one Type A plug for power and data and a second Type A plug for additional power, is recommended; users of portable devices like the Apple MacBook Air or Microsoft Surface families, which have USB ports on opposite sides of the device, may also require a USB extension cable which should be connected to the secondary, power-only, leg of the Y-splitter.
Install Lime Suite
Lime Suite provides an SDR driver and a configuration interface along with numerous utilities. Support is provided for the following platforms:
- GNU/Linux, including official packages for Ubuntu Linux;
- Apple macOS via Homebrew;
- Microsoft Windows via the PothosSDR Installer.
Lime Suite can be installed by compiling from source or via binary packages. Note that in the case of Windows a hardware driver must also be installed as a separate part of the process.
For further details see the Lime Suite documentation.
Testing the LimeSDR
Updating the firmware and gateware
The LimeSDR relies on firmware and gateware loaded onto its FPGA to operate, collectively known as the firmware. This firmware is constantly updated to improve the LimeSDR's functionality and reliability, and running the latest version is recommended.
To update the LimeSDR's firmware, as well as to test the communication between the host PC and the LimeSDR, open your operating system's command-line interface and run the following command:
LimeUtil --update
This will update both the firmware and the gateware on the LimeSDR to the version supplied with your copy of Lime Suite. Do not disconnect the LimeSDR during the update process.
Testing basic operations
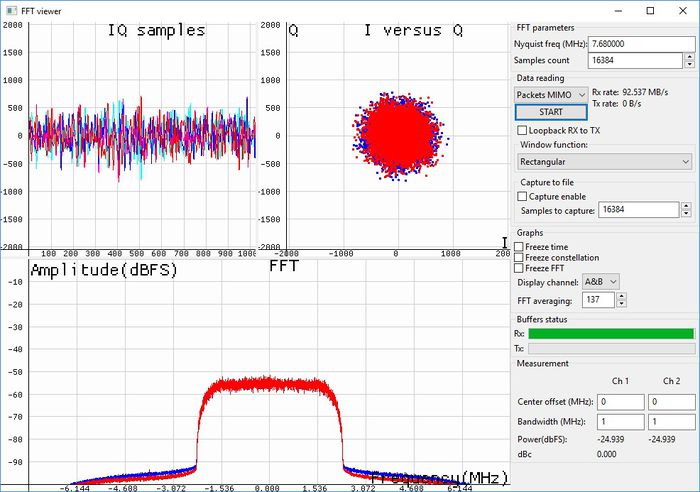
Instructions for carrying out a loopback test using Lime Suite are available on the page LimeSDR-USB Quick Test. This loopback test is the simplest and most direct way of confirming that you have a functioning board with appropriate USB controller firmware and FPGA gateware loaded.
Testing via SoapySDR
The Lime Suite wiki page explains how LimeUtil can be used to get a list of available devices and SoapySDRUtil to verify that it will be available to SDR ecosystem applications via SoapySDR. Providing the LimeSDR is listed by SoapySDRUtil, you are ready to begin working with it using the compatible software of your choice.
| |||||||||||||||||||||


